AuthCentral Service Authentication Flow
AuthCentral provides three types of endpoints to handle different authorization flows:
- Backend-to-Backend (B2B) Endpoints (
/api): Used when a connected application requests a token from the authorization backend service. - Frontend-to-Backend (F2B) Public Endpoints (
/public): Used by users before authorization, typically to initiate login or perform actions that do not require a valid authorization token. - Frontend-to-Backend (F2B) Private Endpoints (
/private): Accessed by users after authorization and require a valid token to access protected resources.
Example Scenarios of User Authentication
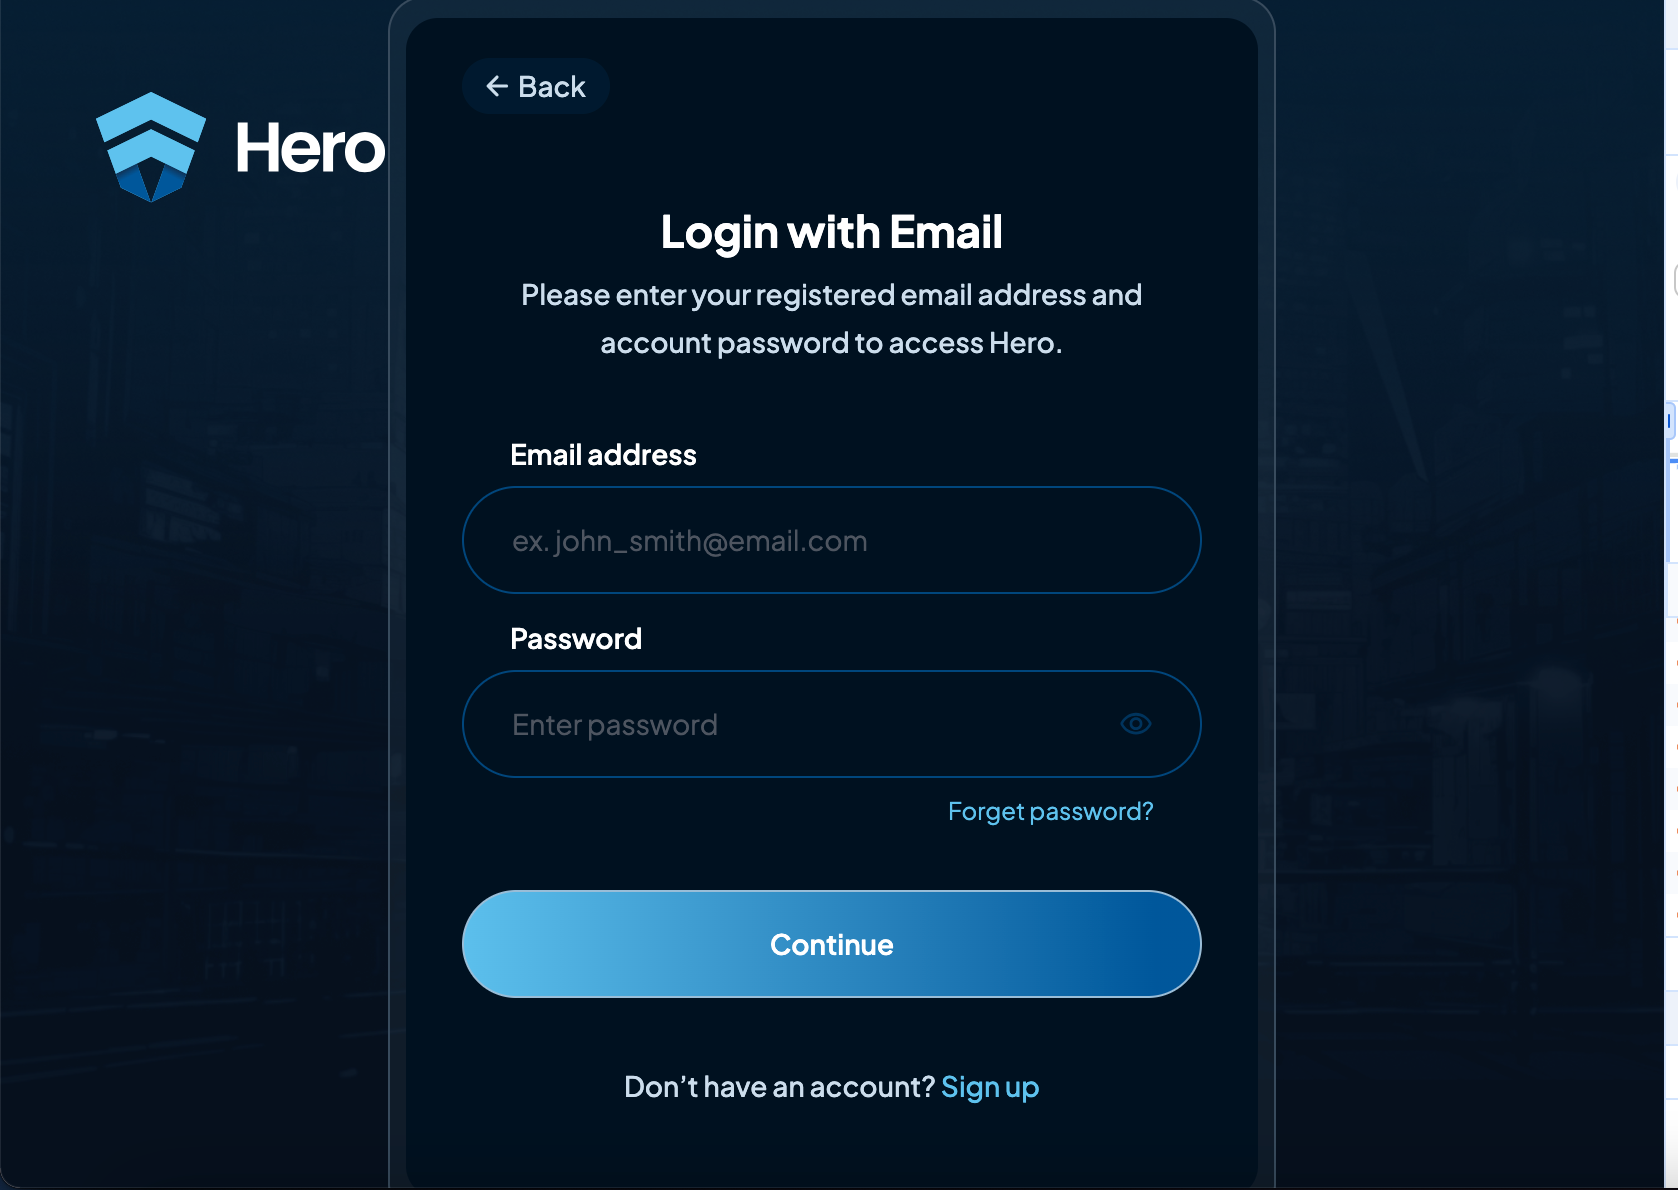
a. Continue with Email
-
Client Request Initiation (CClient)
- The client initiates an authorization request to the backend by submitting the user’s email and password.
- The client calls the appropriate email/password login endpoint from the backend.
-
Email Authorization Request
- After receiving the client's request, the backend verifies the provided email and password over a secure connection (e.g., HTTPS).
- The backend checks the credentials against the stored values in its database.
-
Backend Response with Authorization Status
- If credentials match:
- The backend responds with a session or access token, for example:
{"token": "eyJhbGciOiJIUzI1NiIsInR5..."}
- The backend responds with a session or access token, for example:
- If credentials do not match:
- The backend returns an error message, e.g.:
{}
- The backend returns an error message, e.g.:
- If credentials match:
-
Redirect and Successful Authorization
- Upon successful authentication, the client is redirected to a success page or can continue its session with the provided token.
- Example success URL:
https://authcentral-1.dev.hero.io/demo/success?auth_token=yXgAvzm8yG6u30WMS-rOAW73_4bAE5Jv
- The token indicates that the user is authenticated and can be used for accessing protected resources (e.g., fetching user data, making API calls).
-
Error Handling
- In case of failed authorization (e.g., incorrect email or password), the client receives an error message, prompting the user to retry or reset their password.
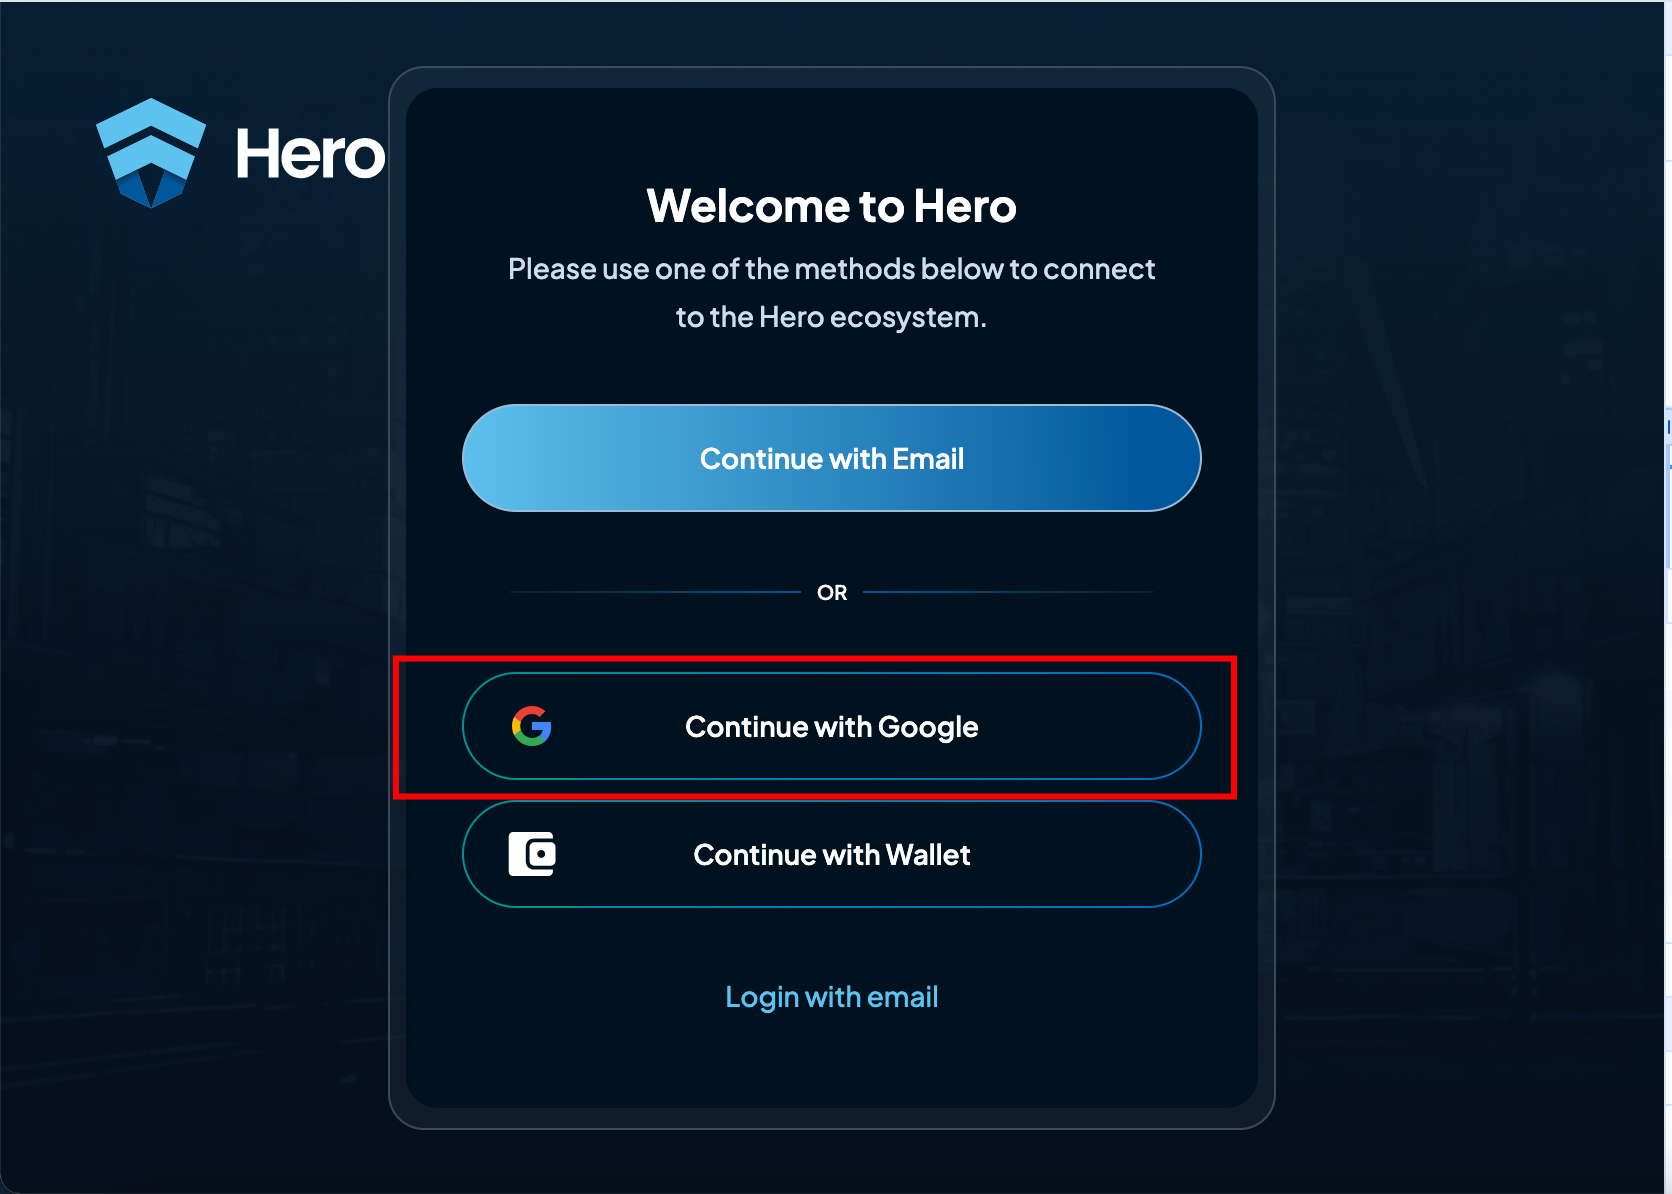
b. Google Authentication
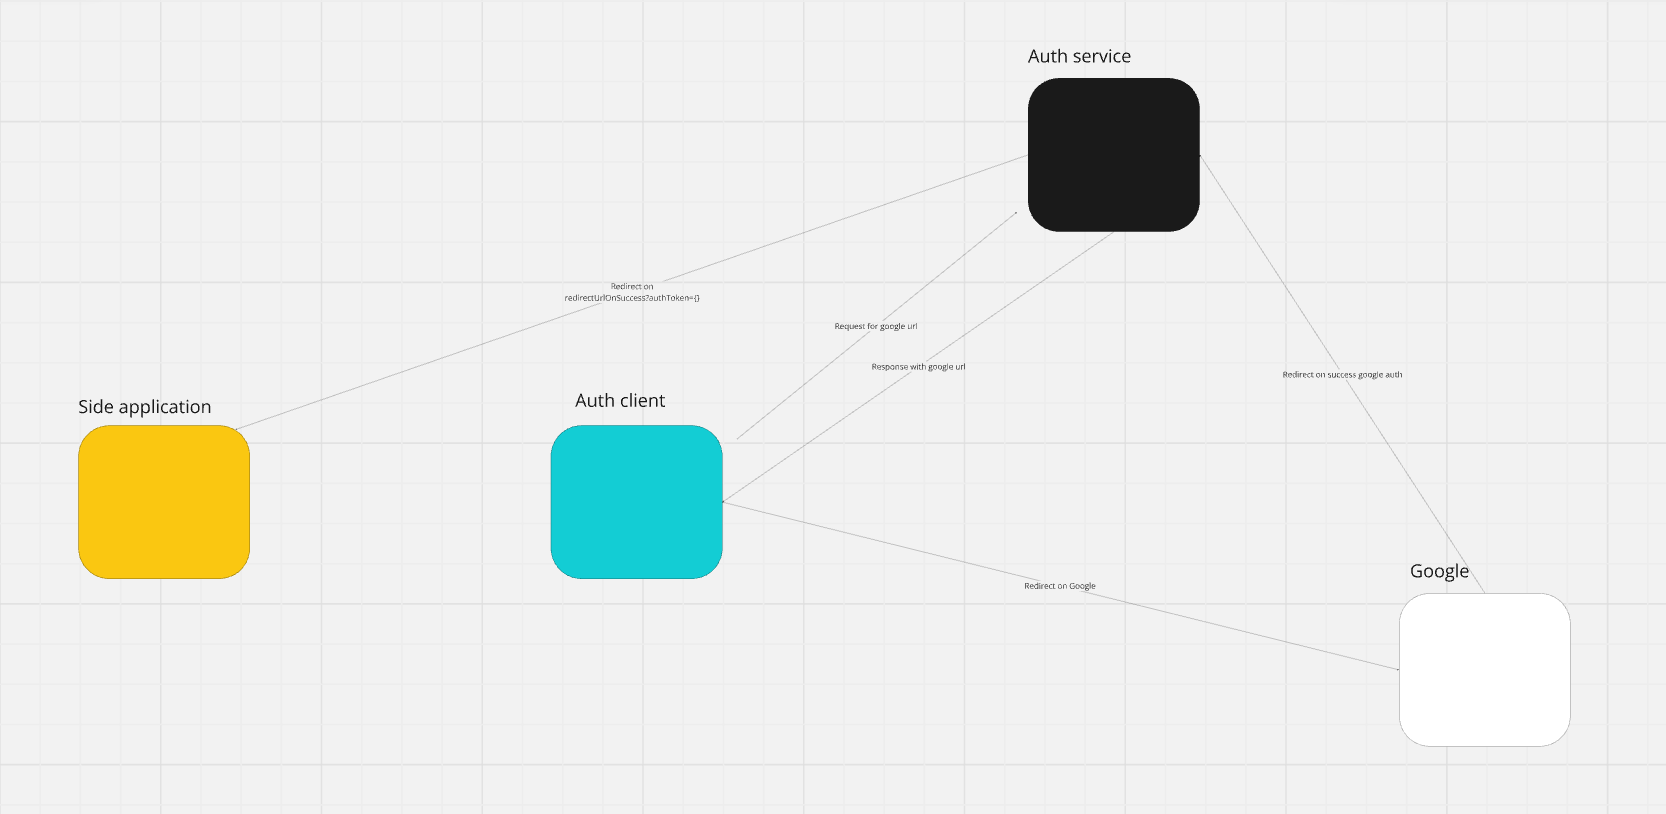
-
Client Request Initiation (CClient)
- The client initiates an authorization request to the backend with a token obtained from Google (or another third-party provider).
- The client requests the appropriate Google authentication URL from the backend.
-
Google Authorization Request
- Upon receiving the client’s request, the backend communicates with Google to obtain the required authorization link.
-
Google Responds with Authorization URL
- Google responds with a URL that allows the user to continue the authorization process.
- Example Google authorization link:
connect/google?FB
-
Redirect and Successful Authorization
- Upon successful authorization, the client is redirected to a success page.
- The success URL includes an authorization token, for example:
{redirectUrlOnSuccess}?auth_token=BRu65kPEnghYtd7teD_tcjMJC4eUwBoa
- This token confirms that the user has been authenticated.
c. Web3 Authentication (Continue with Wallet)
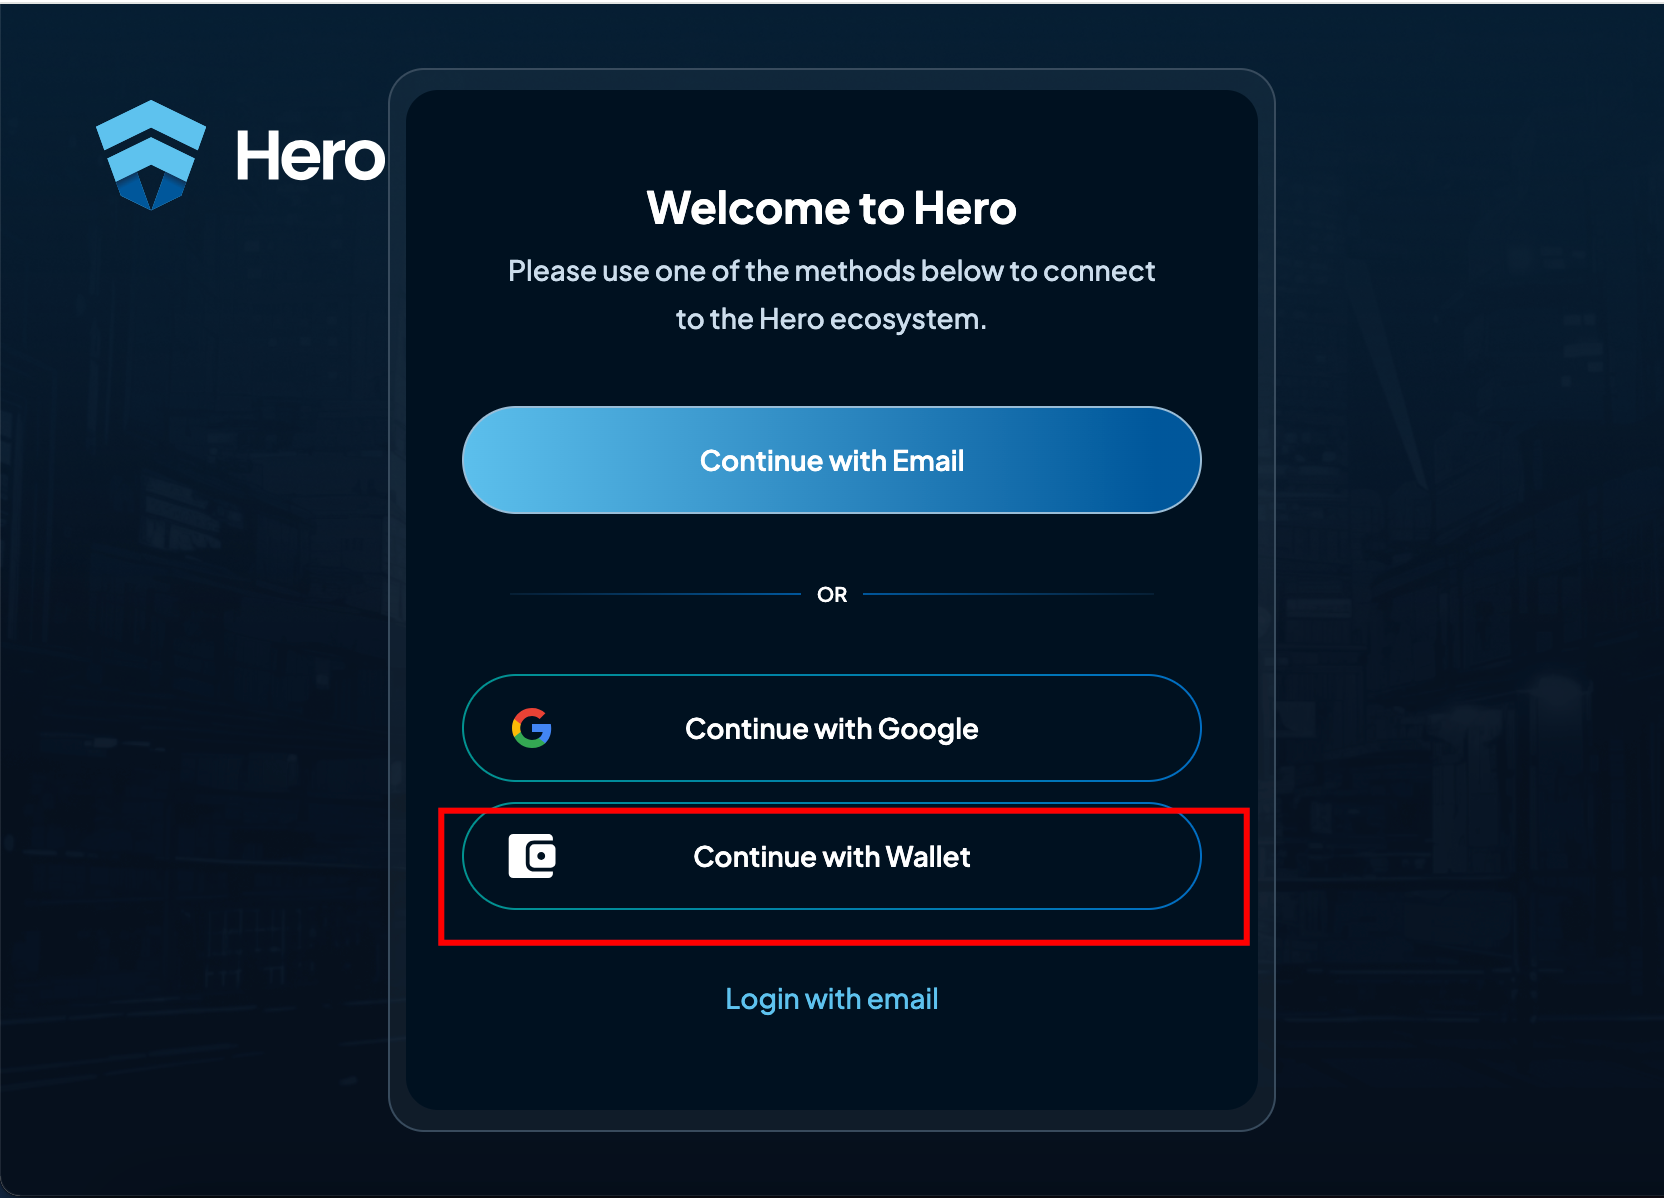
-
Client Request Initiation (CClient)
- The client initiates a Web3 wallet authentication request (e.g., MetaMask or Trust Wallet).
- The client’s frontend prompts the user to connect their Web3 wallet and requests the wallet address.
-
Wallet Connection
- The user connects their wallet, and the application retrieves the wallet address.
- Example code for MetaMask:
const accounts = await window.ethereum.request({ method: 'eth_requestAccounts' });const userWalletAddress = accounts[0];
- The frontend sends this wallet address to the backend to generate a unique nonce (a random string) for signing.
-
Message Signing Request
- The backend generates a unique nonce to verify that the user controls the wallet.
- The frontend prompts the user to sign the nonce with their wallet.
- Example code for message signing:
const message = "Sign this message to authenticate: " + nonce;const signature = await web3.eth.personal.sign(message, userWalletAddress);
-
Backend Signature Verification
- The signed message is sent back to the backend for verification.
- The backend uses the wallet address and signature to verify authenticity.
- Example verification:
const recoveredAddress = web3.eth.accounts.recover(message, signature);if (recoveredAddress.toLowerCase() === userWalletAddress.toLowerCase()) {// Successful authentication}
-
Authorization Token Generation
- If verification is successful, the backend generates an authorization token and sends it to the client.
- Example response:
{"authToken": "exampleJwtToken123","expiresIn": 3600}
-
User is Authenticated
- The client stores the authentication token, enabling the user to interact as an authenticated user.
- The user does not need to re-authenticate unless the token expires, in which case the authentication process can be restarted.